Xero is an online accounting software designed for small businesses. If you’re new to Xero, then this guide to getting started should help you quickly get up and running.
Here are 13 steps to get you started using Xero to get a better handle on your finances.
1.Watch the ‘Xero Dashboard’ video
The first step to learning how Xero works is to watch the ‘Xero Dashboard’ video, which can be found in the top left corner of your Xero dashboard.
2. Set up your organisation details
If you have a limited company, ensure that you have a registration number and registered office address. This information needs to be displayed on any invoices you issue.
Go to Settings > Organisation Settings to input or update your business’s contact details, including:
- Display name
- Legal / Trading name
- Registration Number
- Organisation Description
- Physical address
- Registered address
- Organisation type
- Phone and fax numbers
- Logo
- Website
3. Set up your financial settings
Go to Settings > Advanced settings > Financial Settings to enter your company details:
- Financial year end: this will ensure you to have the right year-end for your reports
- Sales Tax / VAT Details: VAT scheme (flat, cash or accrual rate), VAT number and VAT period
4. Add your company’s branding
Next, you can set up your invoices with terms of payment, contract, and logo. To set up various branding schemes, go to Settings > Invoice Settings
Nailing down your terms of payment can help you to improve your cash flow. Having shorter payment terms can help you to get paid earlier.
5. Set up your chart of accounts
If you are switching from another accounting software, then you can import your chart of accounts into Xero, or modify the default chart of accounts.
If you have an accountant, you can seek their help with this decision. However, if you are your own bookkeeper then we recommend using Xero’s default chart of accounts. You can add, customise, or delete these accounts to match the needs of your business.
To make changes to your accounts, go to Accounting > Chart of Accounts. For more information on customising your chart of accounts, click here.
6. Set up your bank account feed
The next step is to set up your bank account feeds, including credit card and PayPal accounts, if you have them. This video shows you how to do that:
7. Reconcile often
Xero makes bank reconciliation easier than ever. Just a few minutes a week spent approving pre-matched items ensures your data is up to date. As Xero is connected to your bank, transactions are pulled through automatically. Xero remembers the last time you categorised a transaction, so you can simply click ‘OK’ if you want it to go to the same category.
You should reconcile weekly, if not daily, to ensure that your accounts are as accurate as possible.
Regularly updated invoices give you a clearer picture of cash flow. With a clear picture of your cash comes the ability to make better business decisions and avoid falling behind on outstanding payments.
Another benefit of regular reconciliation is that you’ll be able to use Xero add-on apps much more easily, as your data will be up-to-date.
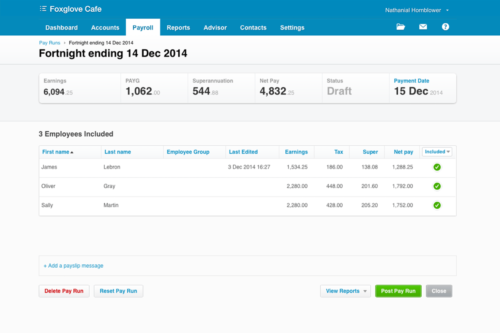
8. Set up payroll
Xero Payroll can help you to monitor your staff costs. This function allows you to keep payroll costs in one place rather than having to pull in information from a separate system.
The payroll overview is a comprehensive guide to take you through each step of the setup.
If you are transferring payroll from another system in the middle of the financial year – don’t forget to add the opening balances.
This can be found at Payroll > Payroll Overview
9. Add payment services
You also need to link to any active payment services to your Xero account. These may include services like PayPal, Stripe, or GoCardless. With a larger variety of payment options, it is easier for customers to pay you.
To do this, go to Settings > Invoice Settings > Payment Services
10. Set up payment reminders
Getting paid quickly is crucial to any business. Setting up payment reminders and organising your credit control systems can help you to get paid faster.
Go to Settings > Invoice Settings > Invoice Reminders
Only set up payment reminders when you get into the habit of reconciling receipts daily. Chasing payment from customers that have already paid can tarnish your reputation. You can come back to this step once daily reconciliation is part of your routine.
11. Add users
You can add users at Settings > Users. Add your accountant, bookkeeper, and other necessary stakeholders.
You can find more information on users here:
12. Learn basic reports
It’s important to learn how basic Xero reports work. Initially, when you’ve input some data, look at your Balance Sheet, Profit And Loss, Aged Receivables, and Aged Payables.
Go to Accounting > Reports to see the options available to you.
13. Connect apps

Using Xero’s wide range of apps and add ons is a great way to streamline repetitive processes and save yourself some time.
Xero offers apps with a wide range of functionalities from cash flow forecasting, to document management, and many more. The Xero app marketplace is the best way to explore your options.
Finally, if you work with one, ask your accountant to check your set up. They may need to add year-end conversion balances and can ensure that your year-to-date figures are as expected.
—
Float is one of the highest-rated Xero apps available on the marketplace. It is an award-winning cash flow forecasting tool that creates accurate and visual reports for you, and your business. Float pulls through the bills and invoices from your accounting software, using them to populate your forecast on a rolling-basis. Float’s integration with Xero means no more manual data entry, and an always up-to-date and accurate forecast.
To learn more about how to use Float sign up for a free trial today.